Disclosure: Some links here are affiliate links. I get a commission if you buy, but you don’t pay extra. This supports my blog and lets me share quality content. I only suggest what I trust and use. Thanks!
Watch: How to Create a New Hub on Wealthy Affiliate: Step-by-Step Guide
If you prefer to Read, continue from here.
Introduction
For the past couple of blog posts, I have been introducing to you, dear readers, about Wealthy Affiliate Hubs.
In this blog post, I will provide you with step-by-step instructions on how to create a new hub on Wealthy Affiliate.
I will share with you my own personal experience on creating a new hub. I created a new hub for my existing website. And I will show you how you can do that if you already have a website.
If you are new, starting a new online business and do not have a website, I will also show you how you can create a website very quickly at the same time while creating a new hub.
Click button for more blog posts about business.
About Wealthy Affiliate Hubs
Wealthy Affiliate Hubs is a platform designed to help you create and manage your niche websites more easily and effectively.
It provides you with core training, website structure, writing tasks, niche research, and content creation tools.
You can connect a hub to a new or existing website and access it from your Wealthy Affiliate dashboard.
How to Create a New Hub
Here are the step-by-step instructions on how to create a new hub on Wealthy Affiliate:
1. Join Wealthy Affiliate
Go to the Wealthy Affiliate website and sign up for an account. You can do this by clicking on the image shown below and filling out the registration form.

2. Go to Hubs Section:
Once you have signed up and logged in, navigate to the “Hubs” section of the website. This is where you will create your new hub.
3. Create a New Hub:
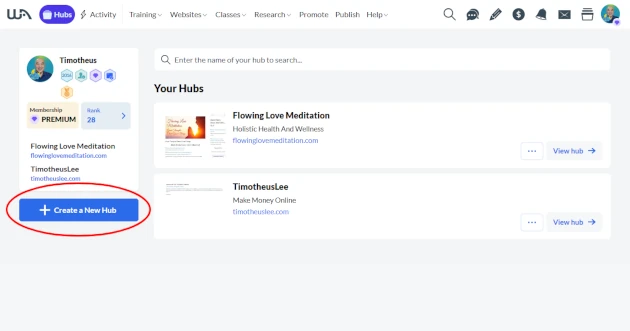
Click on the “Create a New Hub” button to start the process.
Starting a new hub is easy! There is an AI Wizard to assist you along the entire process. Simply follow the wizard’s instructions. The steps here on this blog post can help you should you need further guidance.
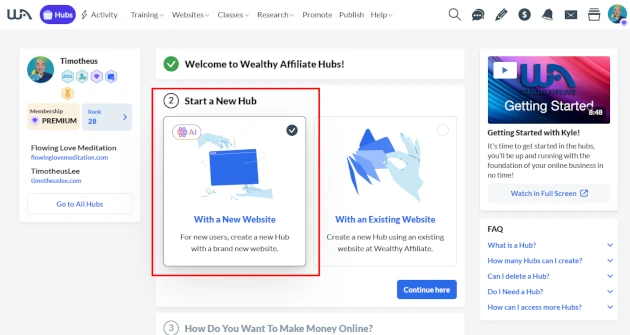
After you click the “Create a New Hub” button, you will be taken to a page that welcomes you to Wealthy Affiliate Hubs. Read the welcome message. Then click on the “Continue here” button.
4. Start a New Hub
You are ready to start a new hub. At this next step, you need to choose whether you are starting a new hub with a new website or an existing one.
With a New Website
You are starting a new online business and a new website. Then you click on the “With a New Website” option.
Then click on the “Continue here” button.
With an Existing Website
For me, I will be creating a new hub with one of my existing websites. So, I chose the “With an Existing Website” option.
Then I click on the “Continue here” button.
5. Choose your website
With a New Website
If you chose “With a New Website” in the earlier step, then skip this step. Go on to the next step.
With an Existing Website
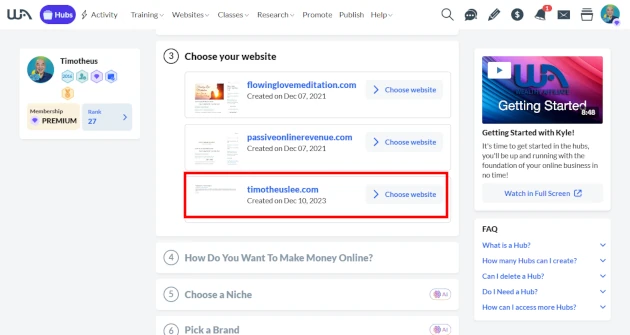
If you chose “With an Existing Website” and your website is hosted on Wealthy Affiliate, you will see a next page like the one below.
Wealthy Affiliate AI Wizard will show you all the sites you have hosted on the platform. You will need to choose which website you would like to connect this new hub to.
I chose my personal brand website, which is this website – timotheuslee.com for my new hub. I click on the “Choose website” button.
6. How Do You Want To Make Money Online?
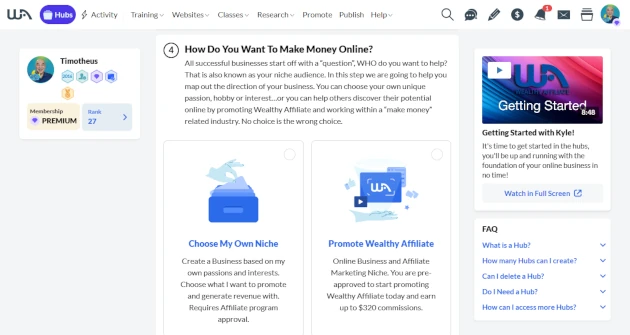
The next step asks you how you want to make money online? There are two choices.
One is to “Choose My Own Niche”. This is when you decide to create a website that is not Make Money Online niche or you do not want to promote Wealthy Affiliate.
For me, my website promotes ways to make money online as well as promoting Wealthy Affiliate. As such, I chose “Promote Wealthy Affiliate”.
After clicking on your choice, then click on the “Continue here” button.
7. Choose a Niche
Next, you must choose a niche you would like to do your online business in.
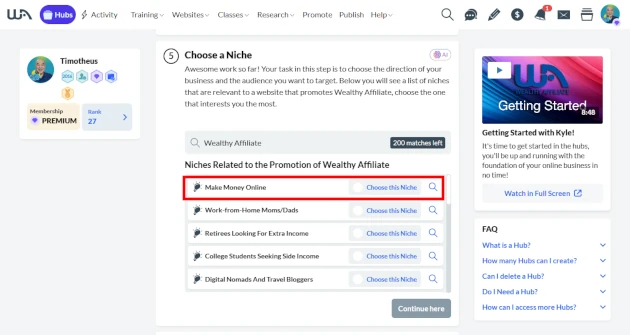
Hubs AI will find niches relevant to your earlier choice of whether you promote Wealthy Affiliate or not.
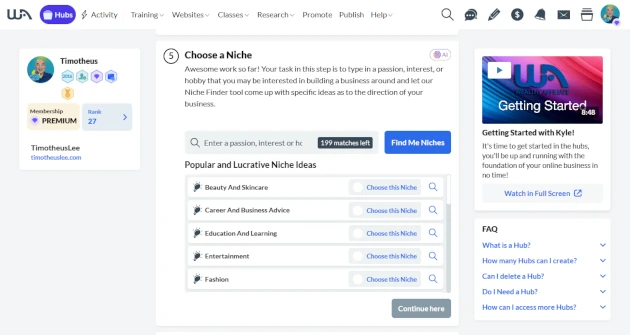
If you chose not to promote Wealthy Affiliate, here is what you might see on the next page.
You can choose a niche you see on the list recommended by the AI Wizard. Or you can type in the field to search for a niche of your choice.
For me, because I chose to promote Wealthy Affiliate, the AI listed niches relevant to that. I chose “Make Money Online”.
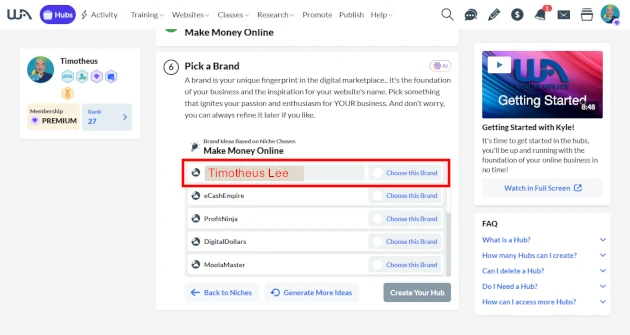
8. Pick a Brand
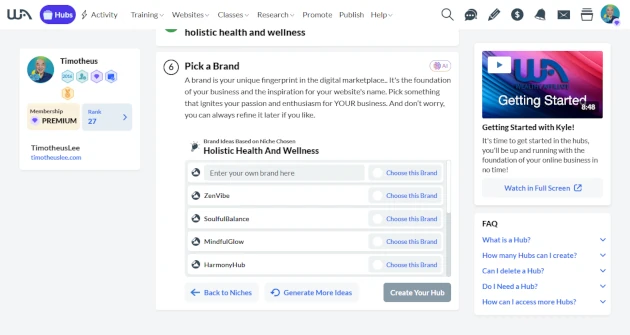
The next step is to create a brand name for your site.
The AI will create brand names relevant and suitable for your niche and website.
With a New Website
If you are starting a new business and a hub, you will be led to the following page.
You simply choose which one you would like to have. Click on the “Choose this Brand” button of the brand name you decided on. Or if you have a preferred brand name, you can type it in.
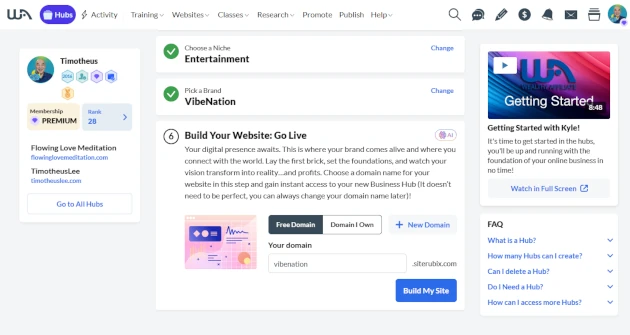
The next page will help you create your new website.
With the Free Starter Wealthy Affiliate membership, you can create one free domain.
If you are a Premium member, you also get one free domain. You can click on the “Domain I Own” button when you already have your own domain. Or you can click on the “New Domain” button if you would like to get a new domain.
Next, click on the “Build My Site” button. And Hubs AI will start to create your website.
With an Existing Website
For me, because I already have a website and a brand, I simply entered my own brand name “Timotheus Lee” into the field provided. Then I click on the “Choose this Brand” button.
Next, I click on the “Create Your Hub” button.
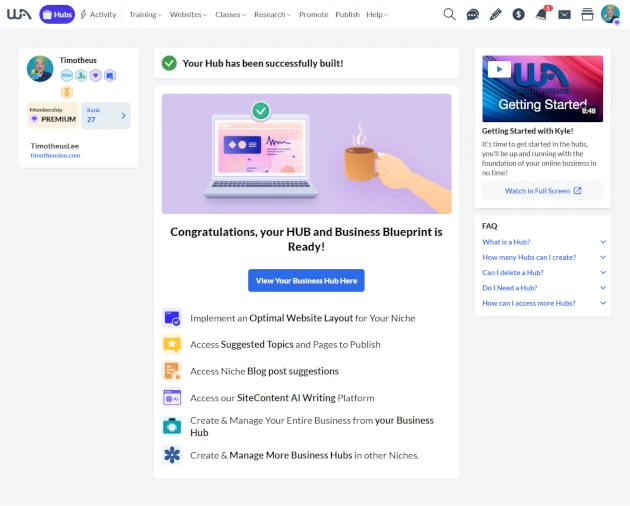
9. Your Hub and Business Blueprint is Ready
The next page is confirmation that your hub and business blueprint are ready.
Click on “View Your Business Hub Here” button to visit your new hub.
With a New Website
Here is how your new hub for your new website might look like.
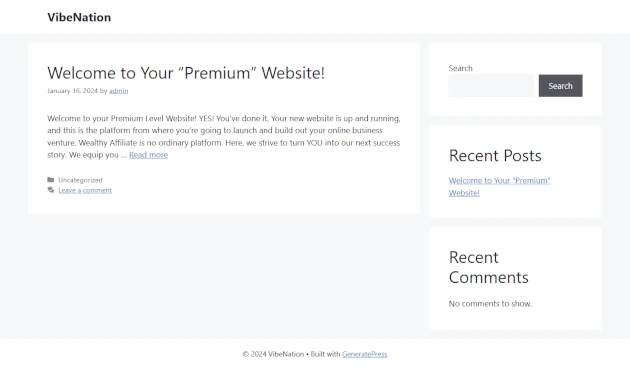
There is a home page with minimal content created by the AI for you. Click on the “View My Live Site” option to visit your new website.
You can edit your homepage or start to add content to your new website from the hub. I will write another blog post on how to do that. So, do remember to join my community to get updates when I publish new blog posts.
With an Existing Website
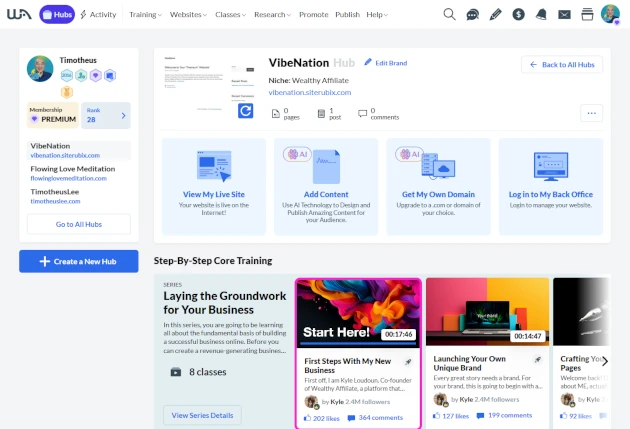
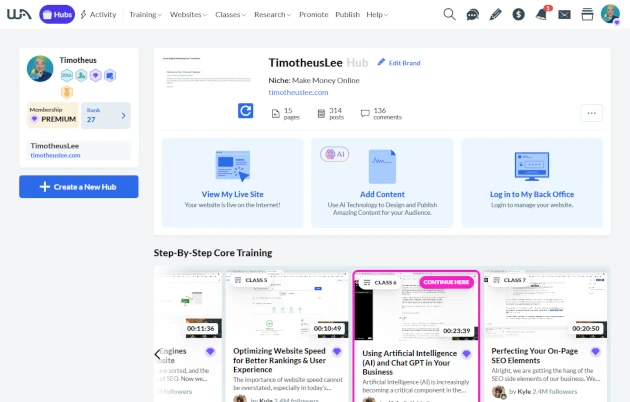
Since I created the new hub with an existing website, I already have a home page and blog posts, like this one on it. As such, my hub page will look a little different.
The subtle differences are, for example, this hub does not have the “Get My Own Domain” option since I already have it.
Also, the training list is a little different. For the new website, the Step-By-Step Core Training starts from the very first lesson.
For my hub, because I had already attended most of the classes before, the AI cleverly notes which lesson are new for me and highlights it for me. This is to recommend me to do the training to upgrade my online business skills.
How to Create a New Hub on Wealthy Affiliate: Step-by-Step Guide
Timotheus Final Thoughts
And there you have it, my dear community. Creating a new hub on Wealthy Affiliate is a simple process that can be completed in just a few steps.
By following the instructions outlined in this blog post, you can create a new hub that is tailored to your niche and reflects your brand.
And you can do it within a couple of minutes or even less. What used to take hours, or even days or weeks, is now possible to be done in a couple of minutes.
Don’t miss this opportunity to access this powerful feature on Wealthy Affiliate. Click on the image below and get it now!


You Get My Bonus!
When you join the above program, I will be your mentor. I will guide you, help you succeed as an online entrepreneur, and make money.
If you have ANY questions, or anything to clarify, please drop a comment below. I will be happy to help you.
I wish everyone good heath, wealth, and success!
Timotheus
Digital Marketer, Lecturer, Amazon Bestselling Author & Cancer Survivor

